Simon Fell > Its just code > October 2020
Wednesday, October 21, 2020
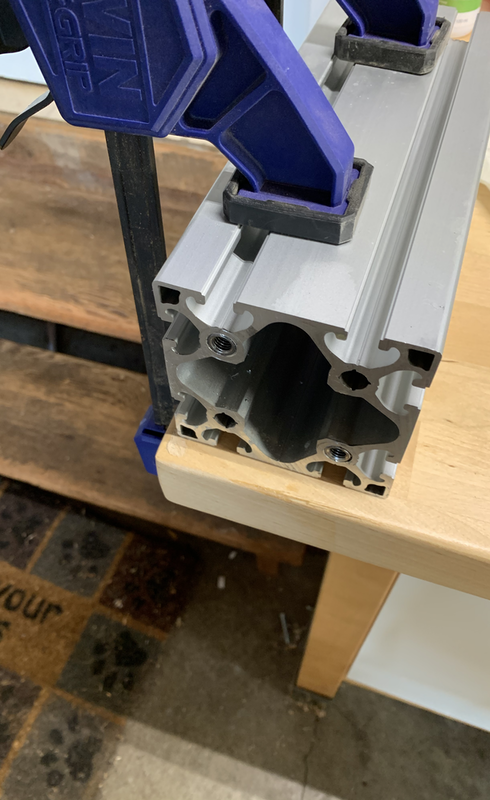
Previously I'd extracted the sheared bolt from the 2nd piece of profile. 2 more to go. At this point, I've gotten to an approach that works reasonably well, counter sink the hole, use the M12 tap to tap the hole, then install the insert. The larger tap wrench and long handled wrench make this easier, but its still a workout. The main thing to watch is that the tap is kept square to the profile, and the insert is kept square while installing. I got the final 16 inserts installed into the last 2 pieces of profile and step 1 is done!.
There's a variation of the build that uses profile from Item24 rather than Kinetic. Having dealt with the thread inserts which was a giant PIA, I'd highly recommend the Item24 variation instead. The Item24 version uses an M10 thread in the profile and M10 bolts to secure the bearing mounts, no thread inserts involved. Also, Item24 can supply the profile with the threads already cut, vastly simplifying what is the most annoying step of the build.
Tuesday, October 20, 2020
The 3D printer is still whirring along, few days left there. The motors and drives turned up, so I did a sanity test on all them to make sure there's no issues. This was straightforward enough, wiring the motor to the driver, plug the encoder cable in, and wire power to the driver. Use the jog function to check that the motor spins. The opensfx docs cover this well.
Mains voltage can kill you! make sure you know what you're doing, or get help from a qualified electrician.
Saturday, October 10, 2020
After i ordered the parts, I got started on the 3D printing, there's a lot of it. There's 5 parts to be printed for each actuator. One set of parts takes about 50 hours to print. You can get these printed via a print service. But now that printers are less than $300 it's more economical to buy a printer and print them yourself. Plus as a bonus you'll have a 3D printer at the end of it.
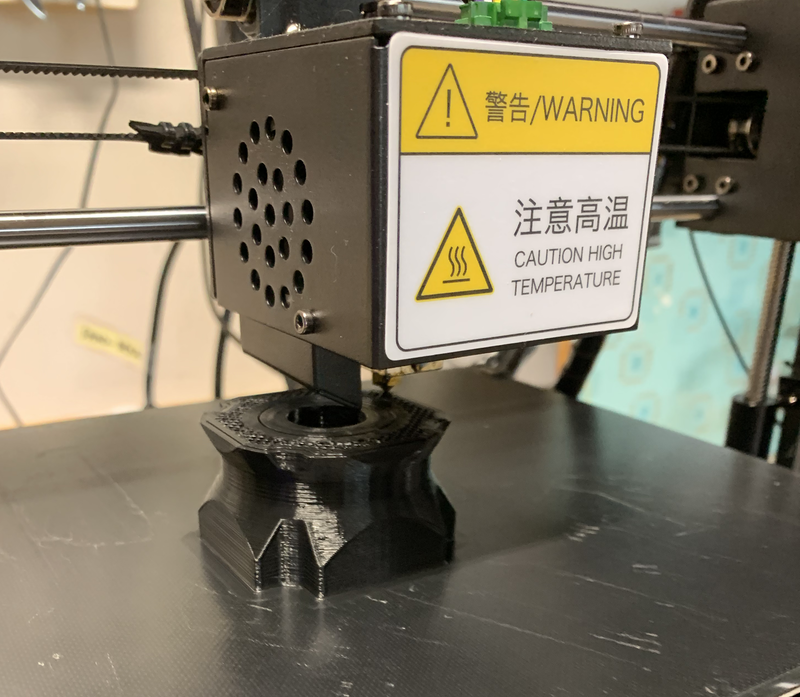
I went with the Anycubic i3 Mega S. It's easy to assemble, just 4 bolts and you're up and running. Getting the print bed level is a PIA, but that seems to be true for all the 3D printers. The Prusa i3 and Ender printers are also popular.
One of the first things i printed was a raspberry pi case/mount so that I could setup Octoprint. This lets you control and monitor your printer from a browser, great for keeping an eye on those 12 hour prints without going out to the garage every time. I use a Sony PS Eye webcam with mine that i picked up for $15. No need to spend more than that for the webcam.
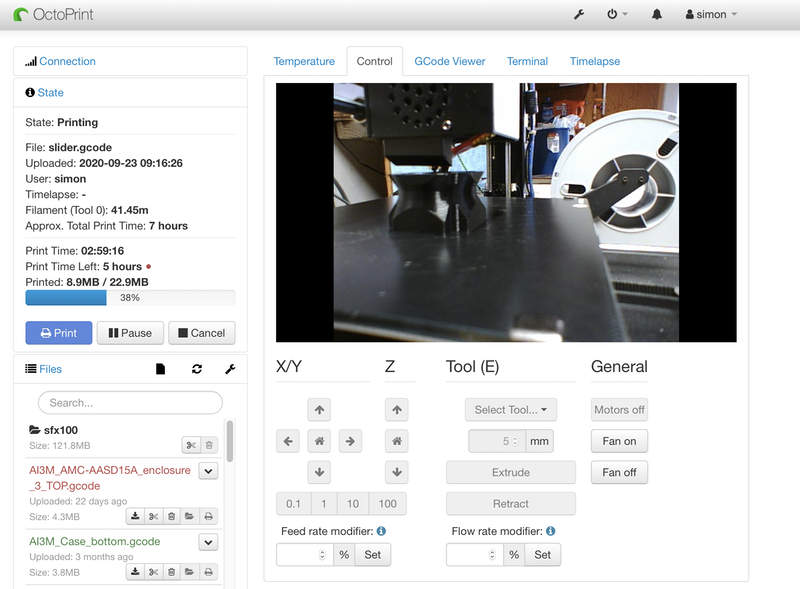
Dimensional accuracy of the prints is important, especially for the slider. Its worth spending the time on some calibration prints first. You'll also want to play close attention to the print profile in the slicer software. The prints are not strong enough with the typical default profile. I setup a custom profile that follows the recommendations. If you're confident in the calibration then go ahead and print all 4 sets. I printed one set first and test fit it to the profile before starting to print the rest.
Tuesday, October 6, 2020
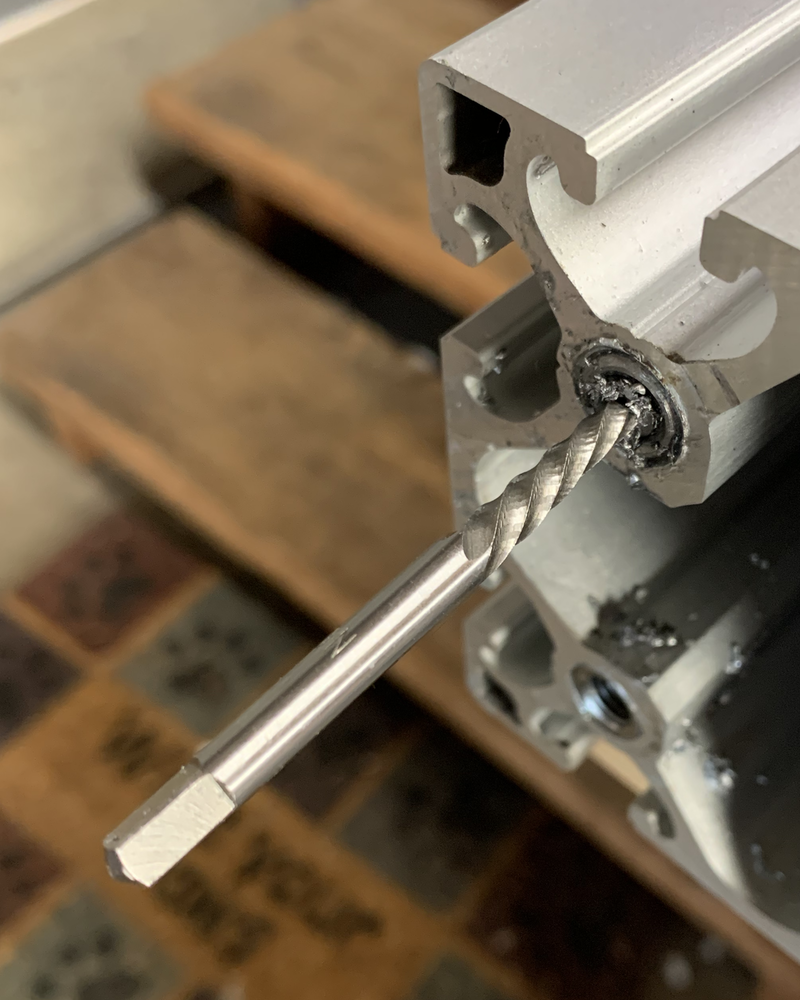
If you recall from the previous post I had a sheared bolt inside the thread insert. The bolt extractor tool turned up, so lets fix that!
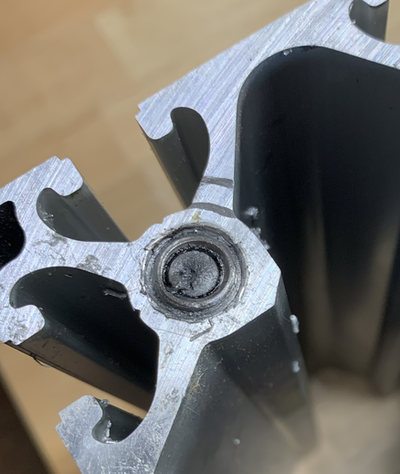
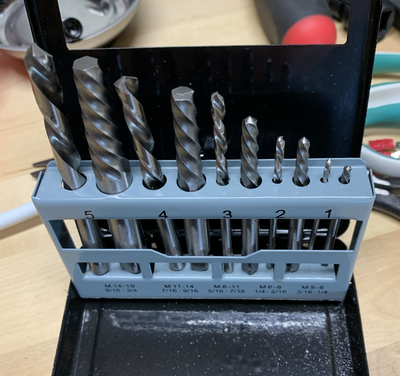
Drill a hole in the center of the bolt, then tap the extractor into the hole.
Now turn the extractor anti-clockwise using a tap handle, and its out!
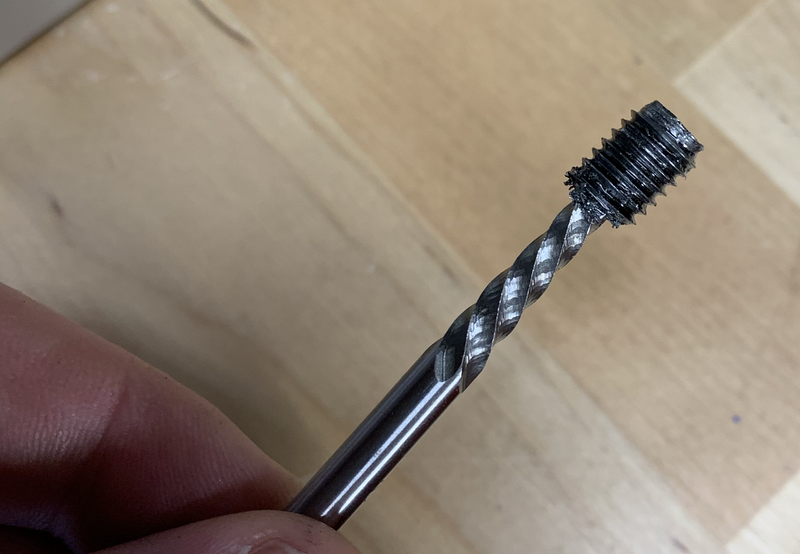
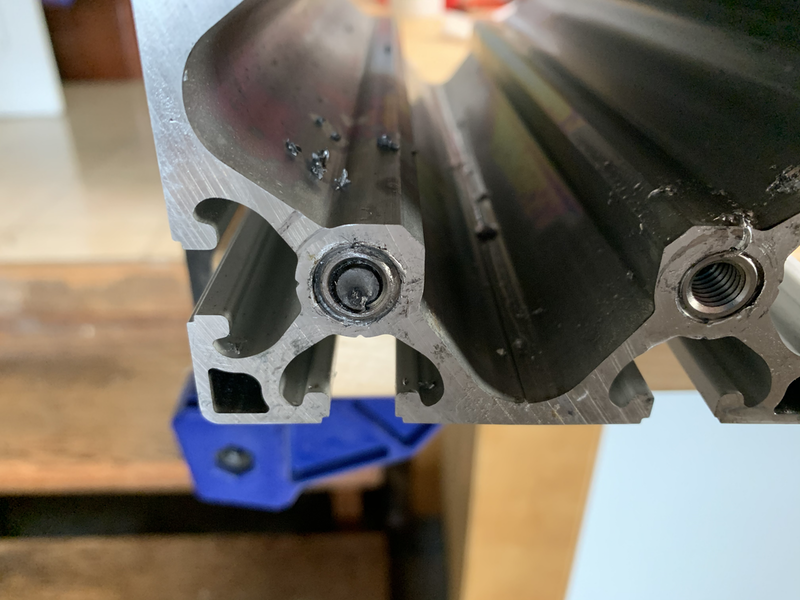
Crisis averted!, onward. On the remaining profiles I'm going to counter sink the hole a little before installing the thread inserts, this should make getting them flush easier.
Saturday, October 3, 2020
First step in the actuator build is to install the threaded inserts into the aluminum profile. 4 Profiles, 4 inserts per end, 32 total.
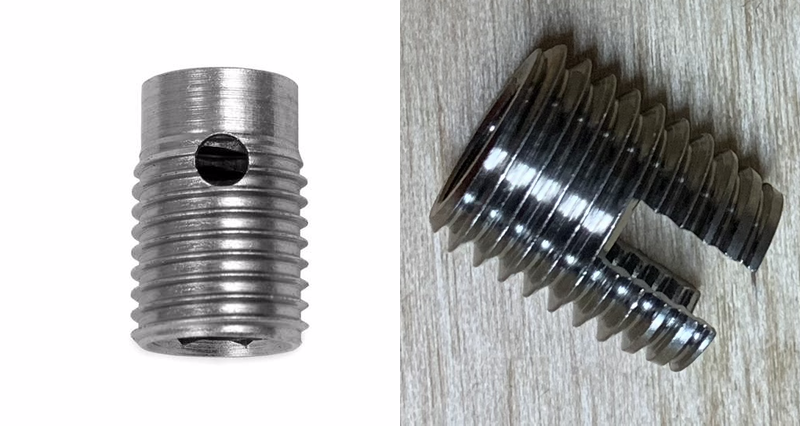
As mentioned in the ordering post, I brought my aluminum profile from a fellow iRacer. They didn't however have the matching thread inserts that kinetic sells. I wasn't able to find these from anywhere, and ended up with some different ones, just to keep things interesting.
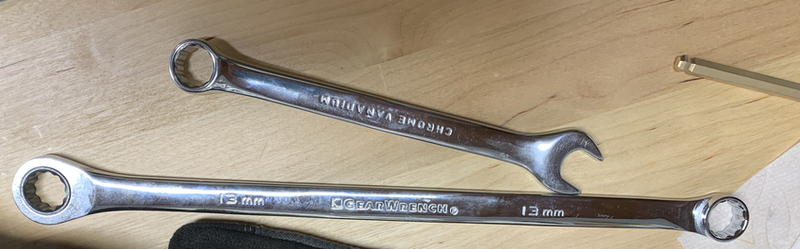
Kinetic insert left, inserts I ended up with on the right. Note that the Kinetic insert has a nice shoulder that helps keep things square when inserting them. Another nice thing about the Kinetic insert is that it has an internal hex, allowing it to be installed with an allen wrench. The info for my inserts mention a specific insertion tool, but i couldn't find anywhere selling them. The insertion tool though is basically a threaded shaft with a nut on it, I made my own with an M8 bolt and nut.
The inserts claim to be self tapping, but have no leading taper, making them very hard to get started. I ended up using a M12 tap in the profile to cut a starting thread that the insert can then use.
2 down, 30 to go, ughh, these are a lot of work. First tapping the aluminum, then the installing the insert. I tried using my battery impact driver, but it didn't have the torque needed to install the insert. One internet order later, i tried a larger AC powered impact driver. That had way to much torque, it mostly ended up stripping the threads on the bolt rather than inserting the insert.
One more internet order later i had a much longer wrench, and one with a built in ratchet end. This made installing the inserts by hand much less work. But that longer leverage means more torque, combine that with the damage done earlier with the impact driver and bingo, one snapped bolt, arrrrgggggghhh.
At this point I've spent a week on this and gotten a grand total of 7 installed inserts. One with a broken bolt stuck in it. One more internet order. when the bolt extract tool turns up this adventure will continue.
Thursday, October 1, 2020
The SFX-100 is an open source/DIY motion actuator for use with racing or flight simulators. I've been enjoying iRacing this year, and thought this would a fun project to work on.
Step 0 is to order everything, there's parts needed from a number of different suppliers, and some of these take weeks or even a month or two to be delivered. The original project parts list is heavy on european suppliers, reflecting where all the development was done. This post on Race Department details better options for US based folks.
I had no issues ordering from ntl bearing or Master Jiangs store on aliexpress, those parts turned up in a couple of weeks. ntl-bearings also now can supply the servo & drives, if you want to cut down the number of different places to order from.
The big lead time is the aluminum profiles from Kinetic, they're a B2B supplier and not set up for lots of little consumer orders. Reports are that it can take 1-2 months for those orders to turn up in the US. I lucked out, someone on the iRacing forums was selling a set of the profiles after decided not to do the build. I purchased those and had them in a week.
These are the main parts, the rest is a laundry list of bits and pieces, all easily available.
While waiting for everything to turn up, its a good time to get started on the 3D printing, there's a lot of it needed.